


You can test it LIVE here: AI Story Generator Tool
In today’s rapidly advancing digital era, Artificial Intelligence (AI) stands out as a game-changer. Think about the convenience brought by voice assistants like Siri and Alexa or the tailored recommendations we get on Netflix and Amazon. AI is not just a buzzword; it’s an integral part of our daily interactions, revolutionizing user experiences and setting new industry standards.
For those who own or manage websites, the AI wave brings a world of possibilities. Picture a website that can intuitively gauge a visitor’s intent, dish out real-time content recommendations, or even whip up content instantly! This isn’t a glimpse into a distant future; it’s the marvel of present-day AI.
Given WordPress’s stature as a leading content management system worldwide, it’s a prime platform for weaving in AI functionalities. Thanks to its rich array of plugins and themes, even those without a tech background or a big budget can tap into the wonders of AI on WordPress.
In this comprehensive guide, our spotlight is on AI-driven text generation. Dive in to discover how you can set up a free AI text generator right on your WordPress site. This nifty tool can be a boon for content creators in need of inspiration or even for providing site visitors with tailor-made text based on their preferences.
How The AI Tool Structure Works
Creating AI tools on WordPress entails four major phases. The following is a full discussion of how to make this tool:
1. Create a WordPress Page
Begin by adding a new page to your WordPress site that will house the AI tool. The user interface for engaging with the tool will be on this page.
2. Add HTML Code
To construct the tool page, add some HTML code. This will be the first point of contact with the OpenAI API.
3. Create a Custom WordPress Function
Create a custom WordPress function that takes user input from the HTML form and transmits it to OpenAI’s API. This feature connects your website to OpenAI, allowing the two to communicate.
4. Synchronizing with OpenAI’s API
This WordPress conduit then intertwines with OpenAI’s API, generating text that resonates with the user’s signals. It’s not just about creating text; it’s about mirroring the user’s voice using the wonders of AI.
How to Get an OpenAI API Key
You must first receive an API access key before you may utilize any of OpenAI’s models. Here’s how to go about it:
Navigate to the OpenAI API page and click the “Signup” button.
You will be asked to sign up for an account. To complete the signup process, please verify your email address.
Once logged in, your API keys may be found on the account dashboard.
Step 1: Integrate the API Call Function
We’ll add the PHP function that will allow our tool to interface with the OpenAI API in this stage. We will utilize the WPCode plugin in WordPress for this purpose.
What exactly is the WPCode Plugin?
WPCode is a WordPress plugin that allows you to run PHP code snippets on your site in a clean and straightforward manner. It eliminates the need to include custom code snippets in your theme’s functions.php section.
Activating and Installing the Code Snippets Plugin
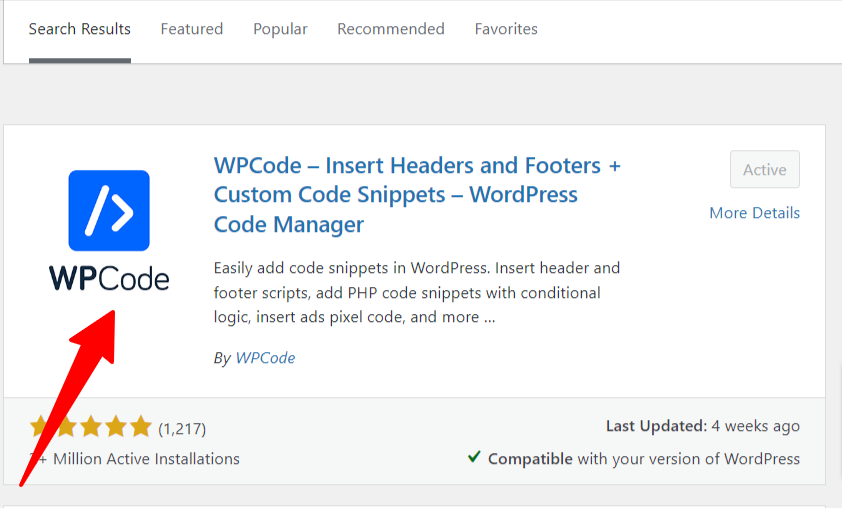
Go to ‘Plugins > Add New’ from your WordPress dashboard.
Enter ‘WPCode‘ in the search bar.
Locate the plugin in the search results and click ‘Install Now’, then ‘Activate’.
Introducing the OpenAI API Call
After you’ve activated the plugin, go through the following steps to add your API call:
- Navigate to ‘Code Snippets> Add New’ from your WordPress dashboard.
- Give your new snippet a name in the ‘Title’ column, such as “OpenAI API Call”.
- Change the code type to PHP.
- Enter your PHP code in the ‘Code’ text box. Here’s an example of how you could write this code:
function openai_generate_text() {
    // Get the topic and language from the AJAX request
    $prompt = $_POST['prompt'];
    $language = $_POST['language'];

    // Adjust the prompt based on the selected language
    if ($language === 'es') {
        $prompt = "Conversación en español sobre " . $prompt;
    } else {
        $prompt = "Conversation in English about " . $prompt;
    }

    // OpenAI API URL and key
    $api_url = 'https://api.openai.com/v1/chat/completions';
    $api_key = 'sk-XXX';  // Replace with your actual OpenAI API key

    // Headers for the OpenAI API
    $headers = [
        'Content-Type' => 'application/json',
        'Authorization' => 'Bearer ' . $api_key
    ];

    // Body for the OpenAI API
    $body = [
        'model' => 'gpt-3.5-turbo',
        'messages' => [['role' => 'user', 'content' => $prompt]],
        'temperature' => 0.7
    ];

    // Args for the WordPress HTTP API
    $args = [
        'method' => 'POST',
        'headers' => $headers,
        'body' => json_encode($body),
        'timeout' => 120
    ];

    // Send the request
    $response = wp_remote_request($api_url, $args);

    // Handle the response
    if (is_wp_error($response)) {
        $error_message = $response->get_error_message();
        wp_send_json_error("Something went wrong: $error_message");
    } else {
        $body = wp_remote_retrieve_body($response);
        $data = json_decode($body, true);

        if (json_last_error() !== JSON_ERROR_NONE) {
            wp_send_json_error('Invalid JSON in API response');
        } elseif (!isset($data['choices'])) {
            wp_send_json_error('API request failed. Response: ' . $body);
        } else {
            wp_send_json_success($data);
        }
    }

    // Always die in functions echoing AJAX content
    wp_die();
}

add_action('wp_ajax_openai_generate_text', 'openai_generate_text');
add_action('wp_ajax_nopriv_openai_generate_text', 'openai_generate_text');


function enqueue_custom_scripts() {
    // Enqueue jsPDF library
    wp_enqueue_script('jspdf', 'https://cdnjs.cloudflare.com/ajax/libs/jspdf/2.4.0/jspdf.umd.min.js', array(), null, true);

    // Enqueue docx library
    wp_enqueue_script('docx', 'https://cdnjs.cloudflare.com/ajax/libs/docxtemplater/3.27.0/docxtemplater-latest.min.js', array(), null, true);
}
add_action('wp_enqueue_scripts', 'enqueue_custom_scripts');
The code provides a PHP function called openai_generate_text, which is called when a request to WordPress with the action openai_generate_text is made.
This method talks with OpenAI’s API to create text based on a user-supplied prompt.
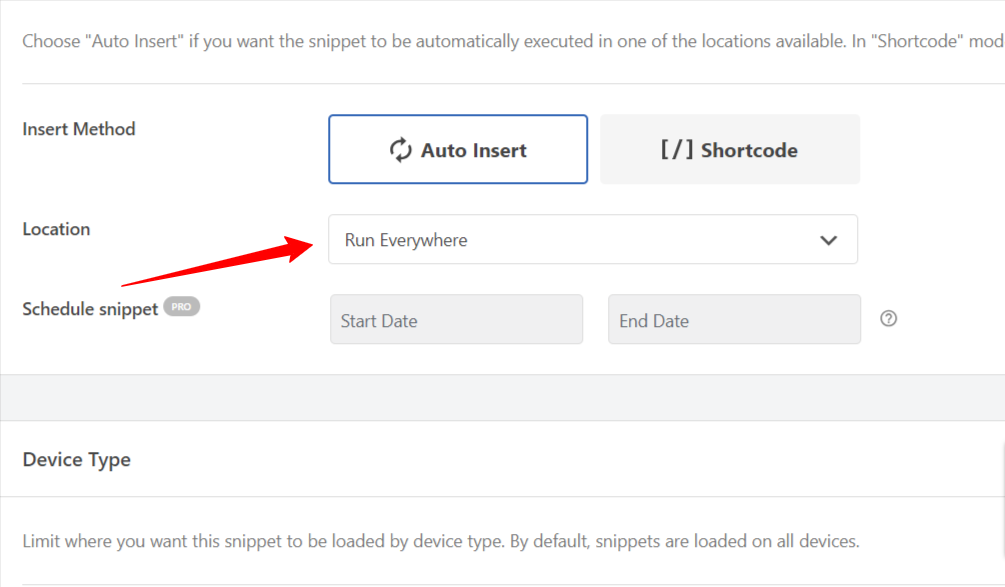
Publish The Code Snippet
Now, be sure to publish this script and set it to execute everywhere.
Step 2: Design the Tool Page
Now that we have our API function ready, let’s add our AI tool to a new page on our WordPress site.
To develop the page, we’ll use Elementor, a popular WordPress page builder.
Please keep in mind that you can use whatever constructor you like. What matters is the ability to insert custom HTML code into the page.
Elementor Installation and Activation
- Go to ‘Plugins > Add New’ from your WordPress dashboard.
- Enter ‘Elementor’ in the search bar.
- Locate the plugin in the search results and click ‘Install Now’, then ‘Activate’.
Making a New Page in Elementor
- From your WordPress dashboard, go to ‘Pages > Add New’.
- Enter a title for your page, such as “AI Tool”.
- To begin customizing your page, click the ‘Edit with Elementor’ button.

Using Elementor to Add Custom HTML
Drag and drop the HTML Code widget onto your page to create custom HTML in Elementor. Take the following steps:
- On the Elementor editor page, there is a sidebar on the left with a number of icons. Select the one that resembles a grid or matrix.
- This will bring up a list of widgets for you to choose from. Search for the ‘HTML’ widget.
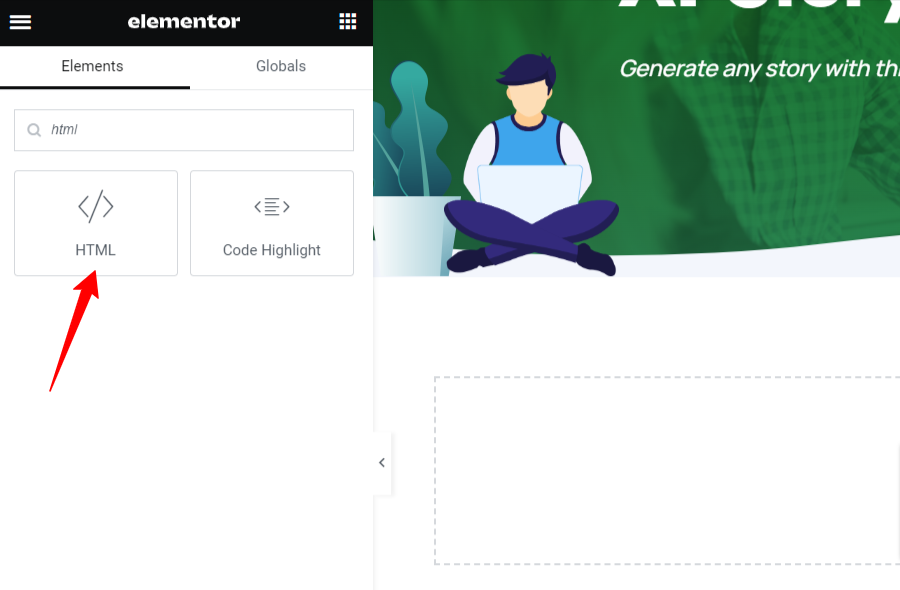
You may insert your AI tool’s custom HTML code here. It will include code for an input field, a button, and a text section for output results in our example.
Basic example:
<div id="text-generation-tool">
        <input type="text" id="topic" placeholder="Your Topic...">
        <select id="language">
            <option value="en">English</option>
            <option value="es">Spanish</option>
            <!-- Add more languages as needed -->
        </select>
        <button id="generate-button">Start Conversation</button>
        <div id="chat-container"></div>
        <div class="action-buttons">
            <button id="copy-button">Copy</button>
            <button id="share-social">Share on Social Media</button>
        </div>
        <div id="loading" class="loader" style="display: none;"></div>
        <!-- Social Media Share Popup -->
        <div id="social-share-popup">
            <button onclick="shareOn('twitter')">Share on Twitter</button>
            <button onclick="shareOn('facebook')">Share on Facebook</button>
            <button onclick="shareOn('linkedin')">Share on LinkedIn</button>
            <button onclick="closePopup()">Close</button>
        </div>
    </div>
To make things easier for you, I produced the whole HTML, JS, and CSS code, which you can just copy and paste. Here we go:
 <title>Text Generation Tool</title>
    <style>
        /* Basic styles for the text generation tool */
        #text-generation-tool {
            width: 100%;
            max-width: 600px;
            margin: 0 auto;
            font-family: Arial, sans-serif;
        }

        #topic, #language {
            width: 100%;
            padding: 15px;
            margin-bottom: 20px;
            font-size: 16px;
            border-radius: 5px;
            border: 1px solid #ddd;
        }

        #generate-button, #copy-button, #share-social {
            display: block;
            width: 100%;
            padding: 15px;
            font-size: 16px;
            border: none;
            border-radius: 5px;
            color: #fff;
            cursor: pointer;
            transition: background-color 0.3s ease;
        }

        #generate-button {
            background-color: #3498db;
            margin-bottom: 20px;
        }

        #generate-button:hover {
            background-color: #2980b9;
        }

        #copy-button {
            background-color: #3498db;
            margin-right: 10px;
        }

        #copy-button:hover, #share-social:hover {
            background-color: #2980b9;
        }

        #share-social {
            background-color: #2ecc71;
        }

        #chat-container {
            border: 1px solid #ddd;
            padding: 10px;
            height: 300px;
            overflow-y: auto;
            margin-bottom: 20px;
        }

        .action-buttons {
            display: flex;
            justify-content: space-between;
            margin-top: 10px;
        }

        #social-share-popup {
            position: fixed;
            top: 50%;
            left: 50%;
            transform: translate(-50%, -50%);
            background-color: #fff;
            padding: 20px;
            border-radius: 5px;
            box-shadow: 0px 0px 10px rgba(0,0,0,0.1);
            z-index: 1000;
            display: none;
        }

        #social-share-popup button {
            display: block;
            width: 100%;
            padding: 10px;
            margin-bottom: 10px;
            font-size: 16px;
            border: none;
            border-radius: 5px;
            color: #fff;
            cursor: pointer;
            transition: background-color 0.3s ease;
        }

        #social-share-popup button:last-child {
            margin-bottom: 0;
        }

        #social-share-popup button:nth-child(1) {
            background-color: #1da1f2;
        }

        #social-share-popup button:nth-child(1):hover {
            background-color: #1997dc;
        }

        #social-share-popup button:nth-child(2) {
            background-color: #3b5998;
        }

        #social-share-popup button:nth-child(2):hover {
            background-color: #344e86;
        }

        #social-share-popup button:nth-child(3) {
            background-color: #0077b5;
        }

        #social-share-popup button:nth-child(3):hover {
            background-color: #006699;
        }

        /* CSS for the loader */
        .loader {
            display: block;
            margin: 50px auto;
            border: 16px solid #f3f3f3; /* Light grey */
            border-top: 16px solid #3498db; /* Blue */
            border-radius: 50%;
            width: 50px;
            height: 50px;
            animation: spin 1s linear infinite;
        }

        @keyframes spin {
            0% { transform: rotate(0deg); }
            100% { transform: rotate(360deg); }
        }
    </style>


    <div id="text-generation-tool">
        <input type="text" id="topic" placeholder="Your Topic...">
        <select id="language">
            <option value="en">English</option>
            <option value="es">Spanish</option>
            <!-- Add more languages as needed -->
        </select>
        <button id="generate-button">Start Conversation</button>
        <div id="chat-container"></div>
        <div class="action-buttons">
            <button id="copy-button">Copy</button>
            <button id="share-social">Share on Social Media</button>
        </div>
        <div id="loading" class="loader" style="display: none;"></div>
        <!-- Social Media Share Popup -->
        <div id="social-share-popup">
            <button onclick="shareOn('twitter')">Share on Twitter</button>
            <button onclick="shareOn('facebook')">Share on Facebook</button>
            <button onclick="shareOn('linkedin')">Share on LinkedIn</button>
            <button onclick="closePopup()">Close</button>
        </div>
    </div>
In either case! This code was developed in less than 5 minutes using ChatGPT!
Please feel free to use this code as a starting point for any utility you choose to design. For instance, if you wish to alter the placeholder text in the input box, edit the following line:
<input type="text" id="topic" placeholder="Your Topic...">
Save Your Page!
After you’ve pasted your code, hit the ‘Update’ button to save your changes.
Perfect! You’ve now constructed a page for your AI tool and inserted all of the required HTML components. The following step will be to link this page to our OpenAI API function.
Step 3: Connect The Page To The API Function
Now that we’ve created our API function and tool page, it’s time to link them. This is where JavaScript (JS) code comes into play.
What is the purpose of this JavaScript code?
This JS code adds an event listener to the ‘Generate Story!’ button so that when the button is pressed, the topic picked by the user is collected and sent to our OpenAI API function via AJAX.
A loading spinner appears while the narrative is being created. When the story is returned, the loading spinner is hidden and the result textarea is displayed.
If there is an issue at any step, an error message is displayed in the result textarea.
The code also adds an event listener to the ‘Copy’ button, so that when it is clicked, the created tale is copied to the clipboard.
Adding the JavaScript Code
Here is the JavaScript code you must include:
    <script>
        document.getElementById("generate-button").addEventListener("click", function(e){
            e.preventDefault();

            var topic = document.getElementById('topic').value;
            var language = document.getElementById('language').value;
            var prompt = "Start a conversation in " + language + " about " + topic;
            var loading = document.getElementById('loading');
            var chatContainer = document.getElementById('chat-container');

            loading.style.display = 'block';

            var formData = new FormData();
            formData.append('action', 'openai_generate_text');
            formData.append('prompt', prompt);
            formData.append('language', language);

            fetch('/wp-admin/admin-ajax.php', {
                method: 'POST',
                body: formData
            })
            .then(response => response.json())
            .then(data => {
                loading.style.display = 'none';
                if(data.success) {
                    var message = document.createElement('div');
                    message.textContent = data.data.choices[0].message.content;
                    chatContainer.appendChild(message);
                } else {
                    alert('An error occurred: ' + data.data);
                }
            })
            .catch(error => {
                loading.style.display = 'none';
                alert('An error occurred: ' + error.message);
            });
        });

        document.getElementById("copy-button").addEventListener('click', function() {
            var chatContent = document.getElementById('chat-container').textContent;
            var textArea = document.createElement('textarea');
            textArea.value = chatContent;
            document.body.appendChild(textArea);
            textArea.select();
            document.execCommand('copy');
            document.body.removeChild(textArea);
            alert('Copied to clipboard!');
        });

        document.getElementById("share-social").addEventListener('click', function() {
            var popup = document.getElementById('social-share-popup');
            popup.style.display = 'block';
        });

        function shareOn(platform) {
            var chatContent = document.getElementById('chat-container').textContent;
            var shareURL = '';

            switch(platform) {
                case 'twitter':
                    shareURL = "https://twitter.com/intent/tweet?text=" + encodeURIComponent(chatContent);
                    break;
                case 'facebook':
                    shareURL = "https://www.facebook.com/sharer/sharer.php?u=" + encodeURIComponent(document.URL);
                    break;
                case 'linkedin':
                    shareURL = "https://www.linkedin.com/shareArticle?mini=true&url=" + encodeURIComponent(document.URL) + "&title=" + encodeURIComponent(document.title) + "&summary=" + encodeURIComponent(chatContent);
                    break;
            }

            window.open(shareURL, '_blank');
        }

        function closePopup() {
            var popup = document.getElementById('social-share-popup');
            popup.style.display = 'none';
        }
    </script>
</body>
Insert the following JavaScript code into your tool page:
- Reopen the Elementor editor for your tool page.
- Drag and drop the ‘HTML’ widget into your page in the same manner as before.
- Copy the JavaScript code and paste it into the ‘HTML Code’ box.
- To save your changes, click the ‘Update’ button.
- Alternatively, you may put the code into the same HTML Code Box that we previously utilized.
That’s all! Your tool page is now linked to the OpenAI API function, and visitors should be able to utilize it depending on the topic they choose.
Enhancing Our Tool
The procedure does not end after we have our tool up and running. It’s time to optimize. This might range from improving the UI (User Interface) to implementing security measures such as captcha.
One of the most intriguing elements of current AI, such as ChatGPT, is its adaptability and versatility. For example, you can request that ChatGPT improve the code, update the user interface, or adjust any other feature of the application.
Assume you wish to update the user interface of your tool. Simply enter the following request into ChatGPT:
“Could you help me design a cleaner, more professional interface for my tool?“
ChatGPT will make ideas or perhaps create an entirely new set of HTML/CSS codes based on your requirements.
Including a security precaution like a captcha can also make a major difference, since it protects your tool from bots and assures legitimate user interactions. To add a captcha to your WordPress site, there are several plugins and resources available online.
Finally, keep in mind that continual improvement and upgrading your product based on user input is the key to making it more user-friendly and successful.
